Restore structural integrity and extend the service life of concrete assets with epoxy crack injection.
Cracks in bridges, tunnels and other concrete infrastructure can compromise structural integrity, allow moisture to penetrate and accelerate deterioration. Addressing them early can help extend asset life and avoid more extensive repairs.
For suitable structural cracks, epoxy concrete repair by injection provides a way to restore the bond within the concrete without removing and replacing large sections. Low-viscosity resin penetrates deep into the crack, filling and bonding it from within.
Matching epoxy concrete repair to the crack
Not every epoxy concrete repair requires injection. The right method depends on the cause, size and depth of the crack.
- Hairline cracks: Minor surface-level cracks caused by impact shock or thermal attrition during curing. Repair with Megapoxy HX by capillary action.
- Shrinkage cracks: Minor surface-level cracks caused by shrinking concrete. Repair with Megapoxy HX or H by capillary action.
- Settlement cracks: Medium cracks caused when the ground below settles. Use the Crack Injection Repair System for deeper cracks, or patching and surface repair for surface-level cracks.
- Structural cracks: Large, more serious cracks that appear wider, with easily visible depth. This is where Megapoxy’s Crack Injection Repair System comes in.

How crack injection works
Megapoxy’s Crack Injection Repair System has three parts.
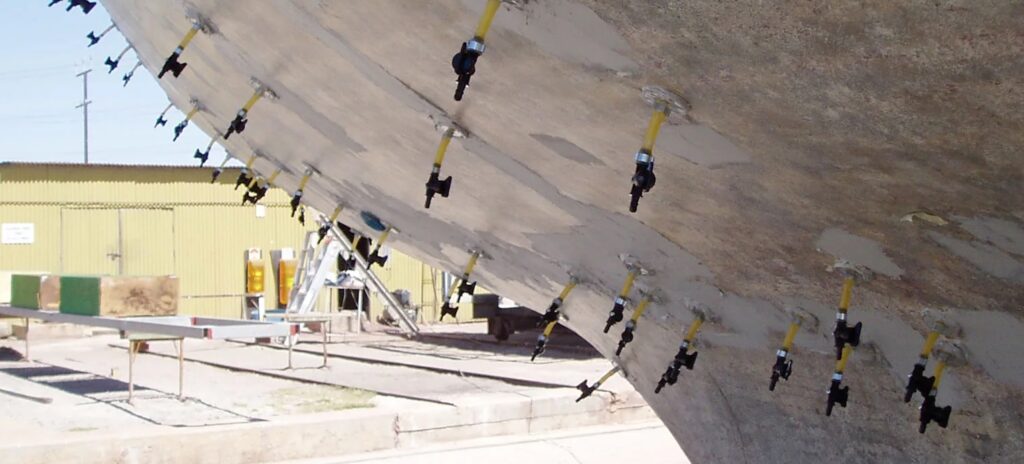
- Injection balloons: Small injection ports – each fitted with a balloon and an air-release valve – are placed directly over the crack at intervals and connected to an injection gun. Resin is pumped through each balloon into the crack. The balloons provide visual confirmation of the injection process. When every balloon remains inflated, the crack is full.
- Megapoxy PM: This high-strength, non-sag epoxy paste adhesive bonds the injection balloons to the concrete and seals the crack surface between them, so the resin stays inside the crack. Megapoxy PF (rapid cure) adhesive can also be used.
- Megapoxy HX: This extra-low-viscosity, high-flow liquid resin can penetrate cracks as narrow as 0.1mm. It is injected through the balloons to fill the crack. Megapoxy H, a low-viscosity hydrophilic resin, can also be used for cracks 0.5mm and wider.
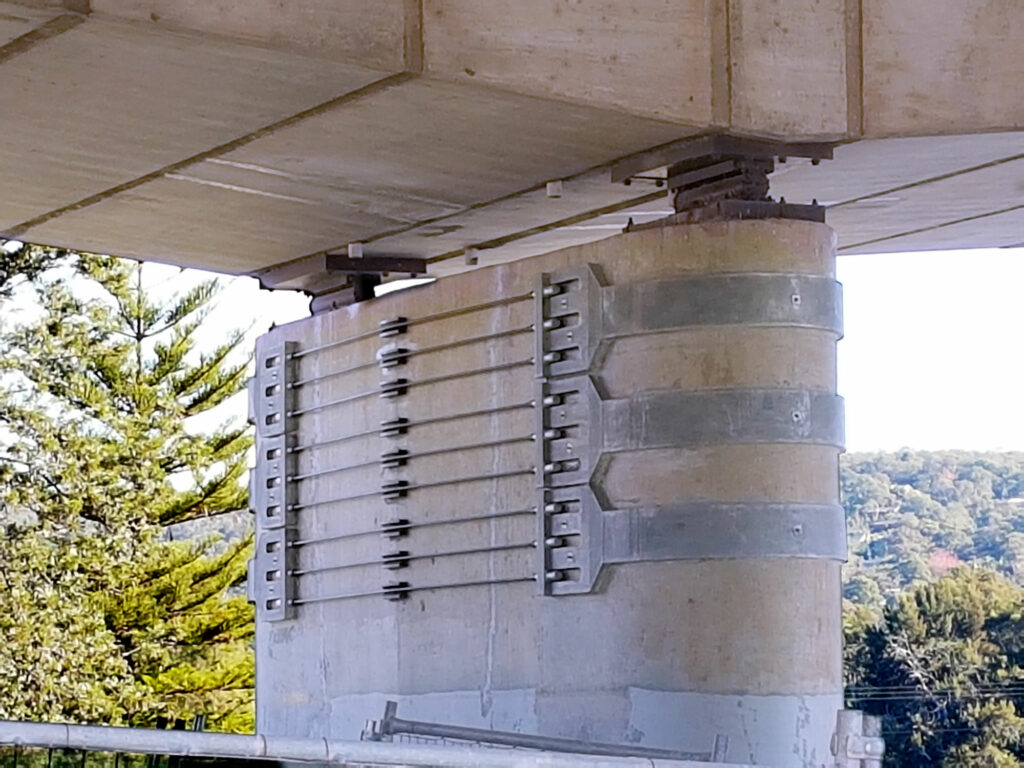
This crack injection system was used to repair and strengthen cracked piers supporting the Regentville Bridge. Balloons were bonded with Megapoxy PM Grey and injected with Megapoxy HX to penetrate deep into cracks. A specified time after injection, the team simply ground off the injection balloons and any additional product, leaving a smooth surface.
The system provided an economical repair method that could be applied in difficult site conditions, including from scaffolding on pontoons moored into position.
Epoxy concrete repair by injection: step by step
Follow these key steps for using the Megapoxy Crack Injection Repair System. For complete application instructions, refer to our Complete Guide to Concrete Repairs and crack injection demonstration video.
Prepare the surface
The concrete must be clean, dry and sound. Remove coatings, adhesives, efflorescence and laitance by chipping, abrasive blasting, high-pressure water or mechanical scrubbing. Grind the surface, remove dust and debris, and blow dust out of the crack with compressed air.
1. Mix Megapoxy PM
- Measure Part A and Part B at a ratio of 1:1 by volume on a flat, non-porous board.
- Fold them together for at least three minutes until the paste is streak-free and uniform in colour.
2. Bond the injection balloons
- Apply a small amount of PM to the outer ring of each balloon base, keeping paste off the smaller inside ring.
- Place the first balloon at one end of the crack, with its tap open.
- Space the balloons approximately 200–300mm apart, closer for narrower cracks, until they cover the full crack length.
3. Seal the crack
- Mix more PM and seal over the base of each balloon, avoiding the latex section. Continue along the crack between the balloons to form a continuous seal.
- If the crack runs through to the opposite side of the structure, seal that side too.
- Allow the PM to cure fully, typically 24 hours at 25°C, then ensure all taps are turned to the open position.
4. Mix the injection resin
- Mix Megapoxy HX (or H) by hand at a ratio of 3:1 by volume for two minutes, scraping the container’s base and corners, without whipping air into the resin. Then scrape down the sides and mix for at least one more minute.
- For clear resin, the mixture is ready when it is completely free of streaks and bubbles. For coloured resin, mix for the full three minutes, as clarity cannot be visually checked.
- Mix only as much as you can apply within the working time, and prepare further batches as needed.
5. Inject
- Pour the mixed resin into the injection gun.
- Starting at one end of the crack, attach the thumb-lock connector to the first open balloon and pump slowly. When the balloon inflates to about 20mm, close its tap and move to the next.
- If resin flows out of the next balloon instead, close that balloon’s tap and keep injecting into the first until it inflates. Then connect to the second balloon before reopening its tap, and continue injecting.
- If a balloon deflates and there are no visible leaks, the crack is not yet full, so keep injecting.
- The crack is full when every balloon remains inflated.
6. Remove and finish
- Once the repair has cured, strike between the silver clamp and the plastic base of each balloon with a chisel to remove it cleanly.
- Grind or sand off any remaining PM and balloon base residue.
- Clean the injection gun by pumping Megapoxy Thinners through it until clear.
Epoxy concrete repair: where crack injection is used
The Megapoxy Crack Injection Repair System is chosen for deep concrete crack filling and sealing across civil, commercial and industrial projects. It’s a precise, simple and efficient solution – particularly for hard-to-reach areas. Typical applications include bridge piers and supports, tunnels, roads, pipes, water infrastructure, marine structures and vessels, and concrete slabs and floors.
Need help specifying epoxy concrete repair?
Watch our crack injection video, download our concrete repair guide or contact our team for project-specific advice and specification support.
Found this useful?
Subscribe below to receive specification advice, real project examples and practical application tips.