Rock Solid Solutions
Cracks put concrete to the test. Whether sealing hairline cracks, repairing structural damage or rebuilding surface coverage, our solutions deliver without compromise or complication.
Types of Cracks
Not all cracks are the same. The first step to choosing the right solution is understanding the type of damage you’re dealing with.
Hairline Cracks
Minor surface-level cracks cause by impact shock and thermal attrition.
Shrinkage Cracks
Minor surface-level cracks caused by shrinking concrete
Settlement Cracks
Medium Cracks caused by ground movement beneath the slab.
Structural Cracks
Large, more serious cracks with visible depth.
Stronger by design
The right repair helps block moisture, reduce wear and prevent future damage.
See how epoxy adhesive solutions deliver more than a quick fix.
Surface Preparation
Good surface preparation ensures stronger adhesion, smoother application and lasting results – saving time onsite and reducing risk of failure.
Before starting
Before repair work, make sure the concrete is:
- Structurally sound: no loose or crumbling areas.
- Clean and dry: free of dust, grease, oil, or other contaminants.
- Exposed and accessible: remove old coatings, adhesives, efflorescence or laitance.
Surface profiles & preparation
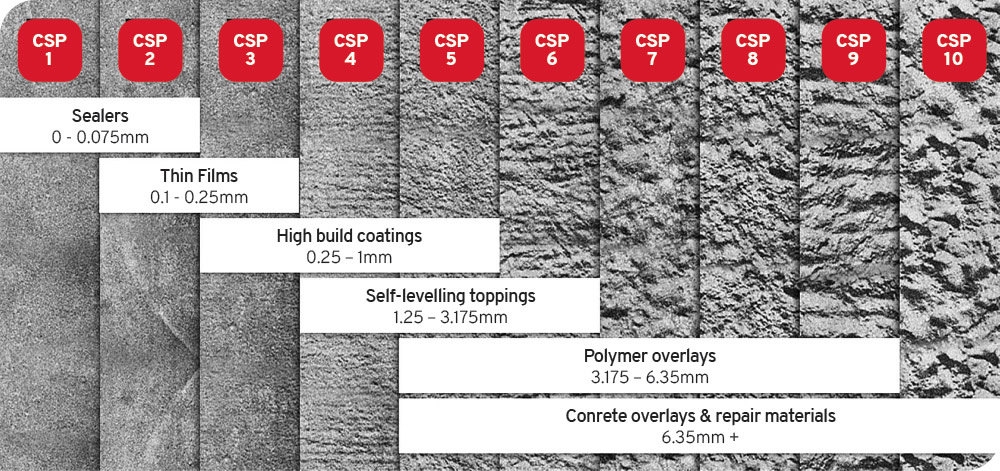
For overlays or concrete restoration, a Concrete Surface Profile (CSP) may be needed.
CSPs refer to the texture or roughness of the surface needed for the repair system being used – ranging from smoothest (CSP 1) to roughest (CSP 10).
See the full concrete repair guide for prep methods, tools and CSP recommendations.
STEP 1: Find the right CSP:
Match the required surface texture to your coating.
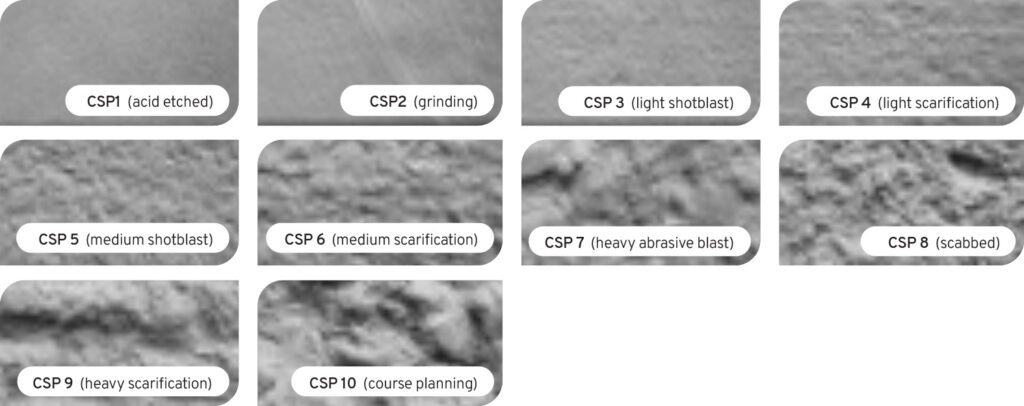
STEP 2: Select the best preparation method:
Use the right technique to achieve the required CSP.
Structural Hull Repair with Epoxy
See how proper surface preparation laid the groundwork for deep structural repair on a ferro-cement yacht hull. The team achieved a permanent, economical solution with simple application and clean-up.
Structural Repairs
Structural cracks need more than a surface fix. Our unique system injects epoxy deep into the crack – preventing further movement and bonding the structure from the inside out.
The Megapoxy Crack Injection Repair System includes:
- Megapoxy PM for bonding and sealing.
- Megapoxy H or HX: low-viscosity adhesives that penetrate cracks as narrow as 0.1mm.
- Injection balloons with air-release valves and connecting hoses.
Structural Epoxy Repair for Critical Bridge Infrastructure
When cracks appeared in a concrete bridge pier, a fast, structural-grade repair was essential.
Working from scaffold pontoons, the team used our precision balloon injection system to deliver deep epoxy fill – combining strength, accuracy and minimal clean-up.
Non-Structural Repairs
Left untreated, even small cracks and defects can lead to water damage, safety risks and costly repairs. We help you restore strength and prevent further deterioration.
Getting it right!
Proven solutions for concrete repair and restoration.
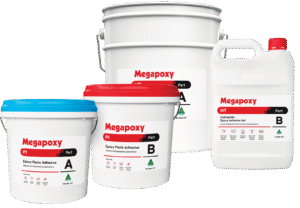
Patching & surface repair (Megapoxy P1 & Megapoxy HT)
Best for wide, shallow cracks where a smooth, even finish matters. Trowel-applied for fast and effective coverage.
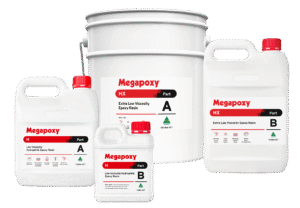
Crack filling & capillary action (Megapoxy H & Megapoxy HX)
Designed to flow into gaps — either poured into deeper cracks or naturally drawn into hairline cracks.
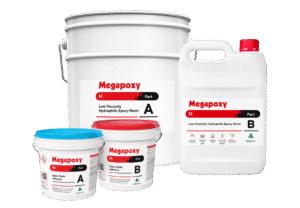
Reinstating concrete covers (Megapoxy P1 or Megapoxy H & P1)
Restores protection over exposed steel where concrete cover is thin or damaged – sealing, smoothing and rebuilding the surface.
Concrete Repair FAQs: Cracks, surface preparation, injection & spalling
What’s the difference between hairline, shrinkage, settlement and structural cracks in concrete and how do you know which repair method to use?
Megapoxy categorises concrete cracks by cause and severity not just how the crack looks on the surface. Hairline cracks are minor, surface-level, and typically caused by impact shock or thermal attrition during curing. Megapoxy HX handles these with a simple capillary action repair.
Shrinkage cracks are similar in scale but caused by the concrete shrinking as it cures, treated the same way with Megapoxy HX or H. Settlement cracks run deeper, caused by ground movement beneath the slab, and call for Megapoxy HX or H via capillary repair for surface-level damage, or crack injection for anything deeper.
Structural cracks are the most serious: large, with visible depth, genuinely threatening load-bearing capacity, and they need the full Megapoxy Crack Injection Repair System, with Megapoxy PM handling the balloon bonding and sealing. Whether the crack compromises structural integrity is what differentiates a capillary-action or patching job from a full injection repair.
Why do all concrete cracks need repairing, even the small ones?
All concrete cracks need repairing because the size at the surface doesn’t predict what happens underneath. Left untreated, even a hairline crack can spread and lead to more severe damage over time. Whether it’s a fine hairline crack sealed by capillary action or a structural crack filled by full pressure injection, the goal in every case is stopping a small problem from becoming a much larger and more expensive one.
What is a Concrete Surface Profile (CSP), and why does it matter for repairs?
A Concrete Surface Profile is an industry-standard measure of surface roughness, developed by the International Concrete Repair Institute (ICRI), running from CSP 1 (nearly flat, acid-etched) to CSP 10 (heavily scarified and rough). Every repair system from sealers, high-build coatings, self-levelling toppings, polymer overlays to structural repair materials need different surface textures to bond properly, and matching the right CSP to a product is one of the strongest predictors of a durable, long-lasting repair. Megapoxy’s approach is to find the CSP your chosen product requires, then select the preparation method that achieves it.
Should you use mechanical profiling or acid etching to prepare concrete for a repair?
Mechanical profiling, grinding, shotblasting, or scarification, is the preferred and safest option for roughening concrete ahead of a repair. Acid etching can work for some coatings, sealers and toppings, but it can be difficult to rinse and neutralise completely, it needs a well-ventilated work area, and it won’t touch petroleum-based contaminants or animal and vegetable oils sitting on the surface. More aggressive mechanical methods such as flame blasting, scabbling, or rotomilling can also cause micro-cracking, which then needs its own additional preparation before the repair goes ahead.
How does the Megapoxy Crack Injection Repair System work?
The Megapoxy Crack Injection Repair System is a controlled pressure-injection method that fills a structural crack from the inside out, rather than only sealing the surface. Megapoxy PM bonds injection balloons to the concrete along the length of the crack, spaced roughly 200–300mm apart (closer for narrower cracks), and once that’s fully sealed and cured, Megapoxy H or HX (depending on the severity of the crack) gets pumped into each balloon in turn. It’s a highly visual system and every balloon should remain inflated once its section of the crack is completely filled, so a deflating balloon with no visible leak simply means that section needs more resin. The whole process works even in vertical, overhead or hard-to-access areas, and is designed to restore real structural integrity in load-bearing elements, not just stop water getting in.
How narrow a crack can epoxy injection actually seal?
Down to 0.1mm. Megapoxy HX is the low-viscosity option built for fine cracks and deep penetration, while Megapoxy H handles crack widths from 0.5mm upward. That range allows the injection system scale from hairline structural cracks to much wider damage. Get in touch with our team to discover which solution is right for you.
What happens if an injection balloon leaks during the crack injection process?
An injection balloon leaking during the crack injection process can happen and doesn’t mean the process has failed. A small pinhole leak can occur where Megapoxy PM was used to seal the balloons over the crack. If that happens, turn off the balloon, disconnect the injection gun, and release pressure by opening the tap so the balloon deflates. Once any leaked resin is wiped away, a liberal coat of Megapoxy PF (rapid-set paste) over the leaking area sets in around 30 minutes at 25°C, after which injection can resume as normal.
What’s the right method for patching a wide, shallow crack in concrete?
For wide, shallow cracks that don’t threaten structural integrity; the kind you’d find across a floor or wall repair for instance, Megapoxy P1 and HT are the best patching solution. The process starts by cutting a clean V-groove along the crack, roughly 10mm deep on each side and 10mm across, then running a concrete cutting blade along the length to open it up slightly and expose fresh concrete to bond to. Mixed Megapoxy P1 gets worked into the prepared groove with a trowel, small tool or gloved hand, then smoothed level with a lightly moistened trowel. It’s a surface-only repair, not a structural one, but done properly it restores a durable, sealed, flush finish.
How does capillary action repair work for fine concrete cracks?
It uses the crack’s own capillary action to draw epoxy resin below the surface, rather than trying to force it in. A solvent like methylated spirits or acetone gets painted onto the crack first, and while it’s still wet, a generous coat of mixed Megapoxy H or HX is brushed directly over it; the resin follows the solvent down into the crack as it evaporates. The visible sign it’s worked is a darker, shinier film along the crack line once cured and running the process a second time without solvent, until there’s no visible ridge along the crack edges, confirms the resin has penetrated below the surface to properly bridge and seal it.
How do you protect exposed reinforcing steel when the concrete cover is too thin or damaged?
Megapoxy P1 is built specifically for this. A minimum 3mm layer of P1 applied directly to grit-blasted steel provides moisture protection roughly equivalent to 50mm of concrete cover when the original cover has been lost to damage or was never thick enough in the first place. The process starts by grinding the concrete back to a fresh, rough finish (typically CSP 3 minimum) and the exposed steel to a bright, shiny finish, before a thin film of P1 is worked into both surfaces and left to cure. A second coat is then trowelled on to a minimum 3mm thickness within 24 hours and smoothed level restoring both the physical cover and removing the immediate corrosion driver. Where spalling is widespread or chloride-driven, a localised patch addresses visible damage but doesn’t necessarily stop corrosion continuing in the surrounding concrete.
What causes concrete spalling (“concrete cancer”), and how do you spot it early?
Concrete spalling also commonly referred to as concrete cancer starts with corrosion of the steel reinforcement inside a structure. Once moisture, chlorides or carbonation reach the rebar, the steel begins to rust, and rust occupies far more volume than the steel it replaces. That expansion puts the surrounding concrete under tensile stress that it wasn’t designed to resist, eventually cracking and pushing away the cover layer above it. Early signs are worth knowing before the damage becomes structural: hairline surface cracking that tracks the line of the reinforcement underneath, rust staining bleeding through the concrete and a hollow sound when the surface is tapped. By the time concrete visibly spalls away, the corrosion driving it has been active for a while which is why catching it at an early stage means a smaller repair with Megapoxy P1 instead of a larger rebuild.